Showing posts with label Modelling. Show all posts

Saturday, 20 June 2009

Supernatural Room


The next room that I created was the supernatural room. I had always seen the rooms colour scheme as green, but Dans had seen purple. I did a few rough tests to view the difference, but it was agreed that green looked cooler (yay!). I also made some quick tests to identify which pattern would look best on the walls, choosing the squiggly lines over the curved.


You can see from the above tests that the wood doesn’t show through the coloured patterns, so it looks a bit strange and out of place with the rest of the ride. When allowing the wood to show through in a Photoshop texture, the glow effect would go, and I wasn’t prepared to sacrifice that. There had to be glow- I could see the image really clearly in my head! Ever the technician, Dan C suggested that I should make an incandescence and glow map. This was a brilliant suggestion as it would basically eliminate my problem, allowing the woody texture I had created in Photoshop to have a glow attached to it, creating the desired effect I was looking for.


I also textured the fire exit. Dan R had previously made the model, but as time was pressing, I had to texture it. The point of the fire exit is to make the room appear fake and obvious as a ride. It is out of place with the Victorian theme we have, but that just adds to the effect. Is the ride really Victorian, or just run down, is it magic or is someone controlling it? It signifies an obvious divide between the areas that are obviously ride, such as Kitty’s room and this room, and areas that are actual worlds such as the cave and the graveyard sequences.




Monday, 15 June 2009

Jury Room


My next task to complete was the jury room. If you remember, this room was meant to originally contain still puppets in a jury, with a judge puppet in a mechanical fortune teller box that would decide the girls fate. Due to time constraints, the jury was axed and just the judge remained. I had started building the judge and his belongings, as seen below, but it was becoming obvious that this idea was not going to work as time was pressing, and even when the model was finished, Dan would still have to skin and rig it.


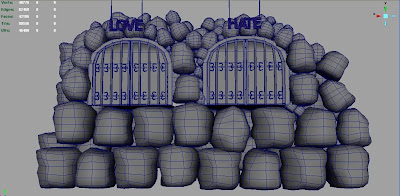
Myself and Dan C had a discussion and decided on a new room idea, axing anything to do with a judge all together. Instead, this room would have a rocky cavern on either end, with a foggy floor, and at the sides nothing but blackness, a no-mans land, with an echoing voice asking them the question that would determine their fate.


To construct the design of the room I built 8 rocks and used a tutorial from the following website to create a texture completly frrom scratch:


http://images.google.co.uk/imgres?imgurl=http://vandelaydesign.com/images/textures/plaid.jpg&imgrefurl=http://vandelaydesign.com/blog/design/photoshop-tutorials-textures/&usg=__u_jrhieQMPxAL-2azbYrtKP5bb4=&h=301&w=300&sz=16&hl=en&start=41&um=1&tbnid=a_NToJhlGUq4fM:&tbnh=116&tbnw=116&prev=/images%3Fq%3Dplaid%26ndsp%3D21%26hl%3Den%26sa%3DN%26start%3D21%26um%3D1


The tutorials on this site are easy to follow and simple to adapt into your own designs. I reccomend them!


I positioned the rocks, using the camera angles Dan C had already set keys for, allowing me to know the space the camera would be viewing, so I could frame the scene effectivly. Once I was happy with the poisioning of the rocks, doors, and 'love or hate' lights that I had built, I attempted to make fog for the scene.


I had never made fog before, so I researched some tutorials online. The one I used was:


http://www.thegnomonworkshop.com/tutorials/simple_fog/simple_fog.html


and then proceeded to conduct some tests:


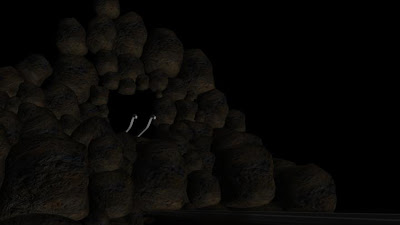
After a few tests, I realised fog wasn't what I was after at all. It was just so static. I decided that smoke would be the way to go. Dan C showed me the basics of how to make smoke and other effects using dynamics and particles in After Effects and how to animate them. I had never used After Effects before so he gave me a run through of the key features. I picked it up pretty quick, as it was very similer to Photoshop, which was good! Armed with the basics, I then created the following smoke tests which made it into the final cut of our film (but more about compositing later :P


Sunday, 14 June 2009

The Carts Fully Textured

My original models....


to my textured models :)...


The next objects on my to-do list to texture were the carts that I had already begun previously. There were more objects than I had first noticed that Jake, due to the pressure of so much work to do, had forgotten to unwrap, resulting in me having to make new UV maps in certain areas.


The texture maps that I used and created:

We noticed as a group that the carts did not look much different in appearance when they were smoothed to when they were unsmoothed. However the poly count in both states had a massive difference. We decided that the carts within the scenes would be left unsmoothed, thus hoping to reduce the chances of crashing when rendering etc.


Bits and Bobs

After a meeting with Dan Dali, I've been gathering images to put into the folders that I'm going to be marked on. For submission I've retaken many images of my models etc to replace the previous ones that I had placed on this blog. As I've worked through this project, I've learnt alot about how to take better imagry etc which I didn't know at the start ,so I'm a bit worried that some of my earlier posts may make me look like a scrape. If you're marking this please check out my folder images, if you're not... imagry will be going up on our website which will be coming out soon.. I'll let you know further details when I have some :)

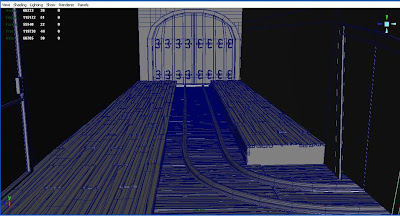
In the meantime, here be a few images that demonstrate the model of the ride and Lee ,better in my opinion, as well as some wireframe shots that demonstrate the workings and polycount of the models which I didn't include before, but think are important to have included. After this post, back to describing my progress through the project... incase you think (or hope :) I'm ending my blog here, because I'm not.. not just yet anyway :)